Guide to Crafting
“Engineering is the art of directing the great sources of power in nature for the use and convenience of man.”
Thomas Tredgold
Have you ever thought of dedicating your life to something meaningful? Well, you have found the guide to it! Once you familiarize yourself with these notes on crafting, you will have learned enough to become a true artisan, a person who is instrumental in lifting your Civilization from the primitive ways of loincloths, caves and wooden clubs to the dizzying complexities of electrified cities, wireless communications and automatic firearms.
Here you will find the basics of how crafting works, along with the information on resource acquirement, tools, various workbenches, machinery and vehicles.
Be sure to consult the following pages:
-
Crafting Atlas - search recipes, ingredients and connected crafting stages. The atlas lists alternative catalogs and research or mode conditions; those alternatives are not all available together. Map, era, faction, tools, fuel, power and custom rules still determine what you can make. A catalog entry does not prove a complete acquisition route on every map. Sprite previews use actual compiled DMI defaults; abstract or dynamic entries show a labeled source symbol, and runtime colors or overlays may differ.
-
In-game Crafting Atlas - the Crafting Atlas verb in the IC tab opens the same catalog inside the game, and crafting menus link to it. Examining almost any item, structure, animal or patch of ground adds a View in Crafting Atlas link to the description, which opens that thing’s page. A recipe made from a material you hold has a Craft this button: with that material in your hands or beside you, it opens the Crafting window on that recipe.
- Type any words into Search, such as
fur coatoriron sword. Recipes with those words in their name come first, then recipes that use them as ingredients. - Click a recipe to see You need and You get, plus its requirements. Made at on the recipe opens the workstation it is made on.
- Click any item to open its page: what kind of thing it is, its description, and basics such as size, where it is worn, armor, damage or nutrition. Below that is how to obtain it and its recipe, with every recipe that makes it and uses it listed on the left.
- Raw materials say where they come from. Copper, for example, lists smelting copper ore in a kiln and casting it into ingots, a pelt names the animal to skin, and juices and oils name the fruit to press into a container. A liquid that nothing makes lists the items it is Found in.
- Tools and weapons made from a material list their melee and thrown damage for each material, such as bronze, iron and steel. Well-made pieces hit harder, up to double.
- Chemistry recipes say where they react. Most react on their own when the reagents are mixed in one open container. Also at: laboratory reaction bench means the bench can run it on demand, and Made at: laboratory reaction bench means it only reacts there. Any catalyst is listed and is not used up.
- Things that no recipe makes or uses have pages too, marked Reference: clothing and armor, firearms and ammunition, furniture, animals and terrain. Search for them by name. An animal’s page lists its health, attack, temper and diet. A reference page describes the thing itself and does not mean it is on your current map.
- Habitat says where wild animals and herbs turn up: which lands (such as temperate, taiga, tundra or jungle) and on what ground.
- Hazard warns about things that can hurt you in ways the numbers do not show, such as lava, deep water, holes, barbed wire, lit fires, set traps, venomous snakes and mosquitoes.
- A workstation’s page, such as the anvil or the laboratory reaction bench, also lists everything made there.
- Unlock era and Made at narrow the list to an age or to one workstation.
- The list shows the recipes for the map you are on. Tick Include other maps to see the versions used elsewhere.
- Needs research marks a recipe your faction or character has not unlocked yet, and names the research. Retired this era marks a recipe that is no longer made in the current age.
- The atlas is a reference: skills, tools and your faction still decide what you can craft.
- Type any words into Search, such as
-
Full Crafting List - contains the list of materials and detailed crafting recipes for most of the craftable items, save for those that require specific machinery or a workbench, such as anvil, bakelizer, gunsmithing bench etc.
-
Guide to Farming - includes the list of the agricultural produce, of which cotton, trees, and hemp are of particular importance for crafting.
-
Guide to Ranching - includes the list of animals, many of which provide various materials for crafting.
-
Guide to Construction - details on constructing walls, floors, doors etc.
-
Guide to Metallurgy - smelting raw metal ores, blacksmithing and metalworking.
-
Miscellaneous Crafting - details on crafting some more or less minor things with a specific manufacturing process.
Quick links:
- Leather tanning
- Mining
- Making swords and pre-1903 firearms - Anvils
- Making armor - Anvils
- Making guns starting from 1903 - Gunsmithing bench
Basics
- Have some material in your active hand
- Click the material, or press Ctrl-Z or simply Z, if you have toggled the hotkeys mode on.
- Or leave the material in your other hand or on the ground beside you and press Shift-C (Ctrl-Shift-C in typing mode).
This will bring up the Crafting window for a given material. Its recipes are sorted into Ready, Missing something and Not learned yet. Click a recipe to see what it needs, then press Craft; nothing is spent before that. Double-click a ready recipe to make one straight away. Many recipes require a certain research level, otherwise they will not be ready! Check the Full Crafting List for an item’s research requirements. If you belong to a faction, you can see the current research levels on the Character tab. If you are not a part of a faction, checking the current epoch on the Status tab will give you a general idea about the available recipes.
Some recipes also become obsolete over time and, consequently, are removed from the list in the later epochs.
While most items are made with just one material, some recipes require having a second material or a specific item in your non-active hand (for example, crafting a bone shovel needs bones and a wooden handle). In this case you will get a message if you are missing the required component.
Skill
Crafting anything increases your crafting skill which is displayed on the Character tab. Some recipes and workbenches require a certain level of the crafting skill, the former to craft an item and the latter to use them. For example, building a well or a wall requires the skill at the 1.1 mark, while using an anvil requires 1.2.
See this table for more info on skill requirements.
Crafting differences between gamemodes
Different gamemodes may limit crafting options in some ways. For instance, in the Tribes mode, the research level for each race is locked, and the list of available recipes does not change, thus only Humans and Orcs can make and use the anvil.
Certain crafting options may also be restricted to certain professions. For example, in the RP maps like Colony and Pioneers, only the Blacksmith can use the anvil.
Tools
  |
Stick | The humble beginnings of a future industrial superpower... First, harvest a branch by clicking a tree on Harm intent. Next, click the branch on Grab intent to remove the leaves, then click it again on Harm intent to clear the twigs. Voila! The first leap on the path of Progress has been made! Now the stick could be sharpened with a sharpened flint or a knife - click the stick with it. A sharpened stick could be used to catch fish (click fish tiles) or ants (click anthills); it could also be used to make a flint axe (see below.) |
  |
Flint | Could be found among rock piles on the ground - click rocks with an empty hand on Grab intent to look for flint. Next, click rocks with flint to sharpen it. Flint also turns up when mining underground rock, and can be knapped into arrowheads, knives and spearheads; see Flint. |
 |
Flint hatchet | Made by attaching a sharpened flint to a sharpened stick. A forefather of more advanced hatchets. |
   |
Knife | Made with either 4 bone pieces or 1 unit of manifold materials: stone, copper, bronze, iron, steel, tin, even gold, silver and diamonds. Metal knives are made via casting in the knife mold. Used to cut trees, skin animals and stab enemies in a desperate situation. Used to cut wires and cut down curtains as well. The bone knife (the top one) is also a surgical tool in the earliest epochs, but for that refer to Surgery. And check the Guide to Cooking for more culinary uses of the knife. |
  |
Hatchet | Made with either 2 bone pieces, 2 stones or a cast axehead (copper, bronze, iron or steel), plus a wooden handle. Mainly used to cut down trees for wood or to remove bushes and even rocks on the ground, but sometimes applied against hostile wildlife or malevolent people. Can be used to break fences or walls as well. |
  |
Hammer | Made with 5 wood logs. Used to deconstruct floors, fences, beds, chairs, tables, braziers, wooden roof supports and many other things - click something with a hammer to see whether it could be deconstructed. Also used to fix and unfix custom signs, paintings and mirrors in place. A clawhammer (the bottom one) is made with 3 iron ingots and functions as a modern and quicker variant of the hammer. Also, do not be surprised if you see your local chef brandishing one. |
  |
Shovel | Made with either 2 bone pieces or a cast shovel head, plus a wooden handle. Used to dig up dirt, sand and snow, as well as for digging underground entrances (tunnels), irrigation channels, pit latrines and graves. For the last four, hold a shovel in the active hand and click it, or press Ctrl-Z or Z in the hotkeys mode, then choose a respective option. An underground entrance (more like exit, in this case) could also be dug upwards if done underground, unless there is some kind of obstacle on the surface, e.g. a floor cover. |
  |
Chisel | Made with either 8 stones or 8 iron ingots. Needs a hammer in the non-active hand to use. Used to give a certain design to a stone wall or an underground rock wall (take notice, that you could still mine through the latter despite it looking like a stone wall). To use, click a stone wall with a chisel. |
 |
Wrench | Made with 5 iron ingots. Used to secure and unsecure movable objects, such as tables, glazed windows, braziers, ovens, furnaces, pianos, catapults and others. |
  |
Pickaxe | Made with either 2 bone pieces, 2 stones or a cast pickaxe head, plus a wooden handle. Used to mine underground rock walls. The iron pickaxe works quicker. |
 |
Jackhammer | Made with 24 steel sheets. Used for the same purpose as pickaxes. The fastest mining tool. |
 |
Chainsaw | Made with 24 steel sheets once Power Tools is researched. Works like a hatchet, but fells trees far faster than any axe. Too bulky for a bag; carry it on your back. |
 |
Ore collector | Made with 5 leather sheets. Used to pick up ore from the ground in a more efficient manner. Have the ore collector in your active hand, stand over the ore on the ground, then click the collector, or press Ctrl-Z or Z in the hotkeys mode. The ore will be put in the collector whose ingenious design allows to exceed the normal stacking limit (50 units per one stack) for its contents. |
 |
Engine maker | Made with 5 iron ingots. Used to construct engines, except for the steam engine. Have the engine maker in your active hand and a stack of steel sheets in the other hand, then click the engine maker, or press Ctrl-Z or Z in the hotkeys mode. Choose the engine to construct. |
More tools and everyday items
- Saw: 3 iron, in the tools category, once your civilization has reached the Bronze Age. Woodworking and hide work accept it like a hatchet.
- Leather gloves: 3 leather, in the gloves category, in every age.
- Found items you can now make: screwdriver, lockpick, legcuffs, tin whistle, police tape, bag valve mask, empty pill pack (fill it by hand with up to 6 pills of one kind), stethoscope, glass jar, small telescope, shamisen, pencil, fancy pen, comb, black and purple lipstick, video camera and bar stools in eight colours, each behind its matching research. Mixing 20 corn oil with 2 lye makes a bar of soap, and 20 olive oil with 2 lye makes deluxe soap (see Hygiene).
- Megaphone: 3 steel, in the tools category, after Electricity. Hold it in either hand and your speech carries 14 tiles instead of 7.
- Glowsticks: 1 plastic each, in green, blue, red or yellow, after Synthetics. Use one in hand to bend it and it glows for about half an hour. It cannot be switched off, gives off no heat and cannot set anything alight.
- Tripwire alarm: 2 tin, in the tools category, after Basic Tools. Use it in hand to stretch it across the tile you stand on. Tin cans rattle loudly when anyone outside your civilization (or your team, in team rounds) walks through. Click it to take it down again.
- Display case: 6 glass, after Glassworking. Click it with an item to put the item on show, and click it with an empty hand to take the item back. Use a key on it to lock it, as with a crate. Smashing the glass breaks the lock.
- Lockbox: 4 iron, after Pottery & Cookware. It holds four small items. The first key you use on it becomes its key; use that key, or a keychain holding it, to lock and unlock it. A locked lockbox cannot be opened or filled, but four heavy blows on harm intent beat the lock off for good.
- Motion detector: 3 electronics, in the tools category, after Digital Computing. Switch it on and hold it. Anything within seven tiles that has just moved shows to you as a blip, even through walls, while anything keeping still stays hidden.
- Labels: with a pen in your hand, right-click a crate, closet, barrel or bag and choose Write Label to add up to 24 letters to its name. Leave the label empty to remove it.
- Crafted flint axes and stone hatchets go straight into your empty active hand when possible.
Resources
As you look upon the sunny fields, bordered by a lush green forest, or upon the scorched desert dunes and steep snow-capped mountains, a warm feeling comes over you - you cannot help but wonder at the abundance of so many resources ripe for the taking, processing and exploiting. Ah, sweet industry!
If there are any recipes associated with a given material, the material name has a link - click it to see the recipes list in the Full Crafting List. If there is no such link, it means the material does not have a crafting menu of its own, but it is still used as a component in some other area of crafting.
Wood
Cutting logs into planks also supplies bark for leather tanning.
There are two main ways to obtain Wood for crafting:
-
Cut down trees in the wilderness - preferably, a hatchet should be used, but a knife works too, although it will take around 15-20 hits to fell a tree. Depending on the tree, the yield is 3-7 wood logs. However, avoid using knives to cut down palms - it will take much more effort to cut the trunk of these desert-hardened trees. Trees will grow back slowly.
 |
Wood log | A visual representation of a wood log placed herein to avoid any ambiguities. This is a guide, after all. Wood is also used to produce lye. Put a stack of wood on the ground (make sure there is no grass on it, or it will start a fire). Click the wood with a lit torch or a flashlight on Harm intent. Scoop the ash (1 ash per 1 wood) with a vessel like a barrel, a bucket, or a cooking pot. Put the ash into a cooking pot and cook it on an oven or a campfire (like boiling water). Every 5u of ash will produce 1u of lye. |
 |
Wood Plank | A visual representation of a wooden plank. Planks are used for the majority of more complex wooden items and can be made from a primitive sawmill or made in bulk from more advanced sawmills. |
 |
Leaves | This is what you get when removing leaves from a branch. Used to make thatch roofing - click the leaves in your active hand, or press Ctrl-Z, or Z in the hotkeys mode. Can be used as fuel for campfires, ovens etc. Edible if you happen to be a gorilla. |
 |
Palm leaves | Obtained by felling palms. Used to make palm leaves roof. Edible for gorillas as well. |
Animals
Almost every living being out there could contribute to the cause of Progress. Let’s examine this more closely, leaving all the edible bits to the Guide to Cooking.
See Harvesting dead animals for timed butchering, species products and yields, and Sinew and primitive tools for rope binding and flint-axe assembly.
   |
Furs and Pelts | Obtained by skinning animal carcasses with a held sharp tool on Grab intent; the species determines the pelt. Keep pelts for their existing coats, gloves, footwear and headgear. To make leather instead, scrape one pelt piece, then wash, dry and tan it as described in Leather tanning. Each piece yields one leather sheet. |
  |
Wool and Woolcloth | Obtained by shearing sheep with shears (made from either bronze or iron). Used for many varieties of clothing, mainly as a cloth substitute for the biomes that lack cotton. Use the loom to turn wool piles into Woolcloth. |
 |
Leather | Used for clothing, military equipment and bags. Finished leather is made from raw hides or pelts through scraping, washing, rack drying and bark tanning; animals do not drop ready-tanned leather. Existing finished leather remains usable in its usual recipes. |
 |
Bone | Supported mammals give bone through either harvesting intent, with yield based on size. A material for primitive tools and weapons. |
 |
Animal fat | Harvesting gives at most two fat portions where the animal's fat rules allow it, through either intent. Animal fat is used to produce lard, which, in turn, is used to produce fat oil. To make lard, take animal fat and click any vessel like barrels, buckets or cooking pots with it. 1 animal fat = 10u of lard. To make fat oil, put lard into a cooking pot (a copper one, for instance) and cook it on a campfire or an oven (like boiling water). Every 2u of lard will produce 1u of fat oil. Fat oil and lard are used in cooking and manufacturing. Fat oil can also be used as fuel for lanterns and the hot bulb engine. |
Soil
This group includes the kinds of soil that could be used as materials. First, you need a shovel - click the ground with it to dig. You may need to remove the grass with a plough first or shovel the snow away (on permafrost tiles the dirt could never be exposed). Farming fields could also be dug. There is a limit to how many times you could dig a single tile.
When you have piles of dirt or snow, you can use them right away to build barricades and walls. Refer to the Construction section for more details.
 |
Dirt | Used to produce Clay and to construct dirt walls and barricades. To produce clay, pour water from a container onto a dirt pile, 10 units of water per pile. |
 |
Sand | Used to produce Glass sheets via firing in the campfire and ovens. |
 |
Snow | Not exactly a type of soil, but could be used to construct walls and barricades, similarly to dirt. |
Ores
The riches that have been accumulating for eons, concealed by mass of rock. Time to hollow out the earth and put them to good use!
Smelting
Metal ores must be processed before crafting, and smelting them is covered in the Guide to Metallurgy. See that section for the detailed description of smelting and available alloys. Smelting ores produces ingots, which are a material that could be used for crafting.
Obsidian is turned into usable material sheets by cutting it with hammer and chisel - click a stack of obsidian rocks with a chisel while holding a hammer in the other hand.
Diamonds are simply… cooked until ready in the campfire and ovens (for now).
| Metals | |||||||||
  |
  |
  |
  |
  |
  |
  |
 |
 |
 |
| Copper | Tin | Calamine (zinc) | Iron | Lead | Gold | Silver | Mercury | Platinum | Uranium |
| Others | |||||||
 |
 |
 |
 |
 |
 |
  |
  |
| Stone | Sandstone* | Marble | Mineral coal | Saltpeter | Sulphur | Diamonds | Obsidian* |
Additional information
-
Uranium is radioactive! It will slowly irradiate everything in the vicinity if left out in the open.
-
The ore yielded from excavation is random, but there is a different chance for each ore depending on the epoch and biome. Some ores are noticeably rarer than others. Among the rarest ores are diamonds, coal, saltpeter, sulfur and uranium. Lead, mercury and platinum are also somewhat uncommon.
-
Marble can be turned into Stone: 2 marble > 1 stone (use “reclaim stone” in the marble crafting menu).
-
Ores marked with (*) could be found only in the undergrounds of certain biomes:
-
Sandstone - Desert.
-
Obsidian - Jungle (obsidian is also available from 313 BC to 1713).
-
Component work tools
For Gunsmithing-era firearm parts, see Flintlock parts assembly.
For optic rails, attachment tools and repair limits, see Firearm maintenance and configuration.
Combine a pickaxe, shovel or hatchet head with a handle using the head-on-handle interaction. The ordinary wood handle costs 1 plank; the plank handle costs 2 planks, and the reinforced handle costs 2 iron ingots with the wrench’s research threshold. Head recipes and their own requirements still apply.
The assembled tool retains both component materials and qualities. Its quality is the lower input quality, bounded from 0.5 to 2, and its condition starts at the worse input condition. A better handle cannot erase damage or upgrade a crude head’s quality. Handle integrity affects capacity; handle weight affects shovel and pickaxe work speed, while head hardness also affects pickaxe speed. These tradeoffs change work duration and durability, not mineral yield. Hatchet tree-chopping delays keep their existing behavior.
Examine an assembled tool to see its components. Existing tools keep their stats. This assembly does not add repair or disassembly; spear and combat-axe assembly remain separate.
Tool assembly workbench
Servers with the merged workbench update offer an optional staged alternative to hand assembly. Craft a tool assembly workbench from 10 soft wood through the ordinary global material catalog; construction takes 100 ticks. Maps using replacement catalogs keep their own availability, and the bench does not unlock restricted heads or handles.
Click the bench with an empty hand and choose Select recipe, then Pickaxe, Shovel or Hatchet. Hold a usable matching head and click the bench to insert it, then insert a usable handle. Status shows missing parts. Choose Assemble and remain adjacent for the ordinary 100-tick (10-second) action. Moving away, incapacitation, ingredient removal or cancellation prevents completion.
Choose Retrieve / cancel to return stored inputs or the finished tool to the bench’s tile. Cancellation preserves ingredients; the bench remains busy until the active action returns. It holds two ingredients or one finished tool. Choosing Select recipe while it holds items returns them to the bench’s tile and switches recipe in one step; this works the same on every dedicated bench below and on the armor assembly workbench. Destruction releases its contents. Assembly preserves the same component materials, quality and condition as hand assembly; existing hand recipes and the gunsmithing bench remain available.
Native saves retain staged parts and finished tools. An active assembly loads as idle, and saved assembly time produces no offline work.
Dedicated crafting stations
Each of these stations is set to one recipe at a time. Click it with an empty hand to see Status, Select recipe or Retrieve / cancel, and to start work. Changing the recipe returns whatever is loaded. Finished items from the fletcher’s bench, toolsmith’s bench and casting foundry are left on the station’s tile, so you can reload and work again without retrieving.
| Station | Built from | What it makes | Inputs per item |
|---|---|---|---|
| Weapon assembly workbench | 10 soft wood | Spear, battle axe or throwing axe | Matching anvil or mold head and a handle |
| Fletcher’s bench | 10 soft wood (arrow-shaft research) | Arrows or crossbow bolts | One bare shaft and one arrowhead or sharpened flint |
| Toolsmith’s bench | 10 iron (iron-anvil research) | Hatchet, pickaxe, shovel, spear, throwing axe or battle axe | Smelted metal (2 for a shovel, 8 for a battle axe, 3 otherwise) and 1 soft wood |
| Casting foundry | 20 steel (steel-anvil research) | Hatchet, pickaxe, shovel, spear or throwing axe | The same metal, as molten metal from a blacksmith pot or jug, and 1 soft wood |
Weapon assembly workbench. Works like the tool assembly workbench, but for weapon heads from the anvil or a mold. Insert one matching head and one handle, then Assemble (10 seconds). The weapon keeps the head’s material, quality and condition.
Fletcher’s bench. Pick Arrows or Crossbow bolts. Load up to 20 bare shafts by hand, or use Load shafts from floor to gather them from your tile and the bench’s tile. Then load one stack of arrowheads (stone, copper, iron, bronze, steel or vial) or several pieces of sharpened flint. Only one kind of head fits at a time. Fletch fits every shaft that has a head in one action, half a second per shaft.
Toolsmith’s bench. A shortcut past the separate head and handle steps. Ore is not accepted, so smelt it first. Place the bench next to an anchored anvil: the anvil decides which metals you can work, so a stone anvil can’t take iron and steel needs a steel anvil. You need the same Crafting skill (1.20x) and, on faction maps, the same blacksmith job as the anvil. Load one stack of copper, bronze, iron or steel and one stack of soft wood, then Make tools. Each tool takes 10 seconds plus 1.5 seconds per metal sheet, and one action makes up to five. Cancelling keeps the tools already made and the unused stock. Battle axes follow the anvil head’s era limit.
Casting foundry. Available from the 1873 era with Machined Tools. Melt copper, bronze, iron or steel in a fired blacksmith pot or jug in a kiln as usual, set the vessel in the foundry and load soft wood. Make tools pours and casts up to ten tools per action, 3 seconds plus 1.5 seconds per unit of metal each. No anvil or smithing skill is needed. Pouring empties the vessel as it goes, and Retrieve / cancel gives back the vessel with what is left in it.
Mining
For terrain-preserving gathering, powered sifters, river concentration and petroleum production, see Resource Extraction.

Safety first! |
Mining is pretty straightforward, save for one nuance:
|
Now about that nuance, which has to do with how supports work. Stay within two tiles of a nearest mining support to avoid a cave-in! Look at the picture - the lantern on the ground marks the maximum safe distance at which you can stand and mine everything in your reach. Even though supports technically hold 3 tiles of the ceiling, if you stand on a tile and there are 2 tiles between you and the closest support, a cave-in is likely to happen. Back to the picture - if you so much as stood on the rightmost tile, where there is no support, it could result in a cave-in (it is not guaranteed to happen, but the probability is high.)
There are two kinds of cave-ins, a minor and a major one, and there is an element of chance as to which cave-in befalls a careless miner. A minor cave-in is more likely to happen at first - a few rocks would fall and leave you with a couple of bruises or a bleeding at worst. But the more you stay at or try to enter the dangerous spot, the higher the risk of a major cave-in, which will literally bury you under the piles of rock, trapping you and possibly breaking some bones. And you better have either wood or stone at hand to make a support, otherwise you are stuck for good. You could scream, of course - someone just might hear you…
Finally, you do not always have to go underground to mine. The rock tiles suitable for mining could also be found on the surface, sometimes covering a large area (they are still named ‘underground rock’, though.) Be mindful, that, if you start mining and the ground under the excavated rock walls appears darkened compared to the outside, it means the darker area is considered a cave and you need to place supports there to prevent cave-ins, just like underground.
And do not forget the ore collector!
Petroleum
There is nothing like burning some dead, millions of years old microorganisms for your own comfort or processing them for shiny plastics, so let’s start drilling!
 |
Oil spring | A spot where an oil deposit reaches the surface of the earth, allowing the collection of crude oil with any containers that could hold liquids: buckets, barrels etc. Click the oil spring with a container, and you will fill it with 10 units of oil. The oil spring will refill presently. Before the advent of engines and machines, crude oil is mostly used as fuel for lamps and lanterns, or as a handy tool by scheming poisoners in royal courts. Yes, drinking oil is bad for health. Very bad. |
 |
Oil well | Now we are talking! With this wonderful contraption, the scope of the oil industry could become truly fascinating. Made with 40 wood logs, the oil well will automatically fill any container you put inside it (click the oil well with the container in hand to put it in, click the oil well to remove it.) Needs to be built over an oil spring. |
Additional information
-
Crude oil could be distilled and processed into a number of petroleum products. See the Machinery section for more information on the respective equipment. However, crude oil could be used directly to fuel one of the more primitive engines - the hot bulb engine.
-
Petroleum as fuel for lamps, lanterns and the hot bulb engine could be substituted with olive oil.
Campfire and Ovens
The means to harness fire.
Fuel
To keep the flames burning, you need fuel, and for that you can use either wood, tree branches, mineral coal or charcoal.
 |
Charcoal | A byproduct of burning, it will appear at your campfires and ovens once in a while and could be used as fuel. |
Pay attention when adding fuel to your fires, so as not to accidentally feed it a whole stack of 50 pieces of coal (unless that is your intent, of course)! Fuel cannot be retrieved! Shift-Click the stack to examine the quantity, then separate the stack by holding it in the non-active hand, pressing Alt and clicking it with the active empty hand.
Here is how long 1 unit of different fuel will last (minutes):
- Wood - 1
- Branches - 1
- Coal - 3
- Charcoal - 0.5
Operating manual
-
Take something that you intend to put in the campfire, oven etc. (food item, ore, fuel.)
-
Click the campfire, oven etc. with it. Fuel is spent irretrievably, while everything else is put ‘inside’ or ‘in the fire’ and could be ejected by right-clicking a campfire or an oven and choosing ‘Empty’ command. The number of items that could fit inside is termed ‘capacity’ (see more in the next subsection.) One stack is considered a single item. Pots do not go inside, they are ‘physically’ put onto the campfire or the oven itself.
-
Click the campfire, oven etc. again to light the fire. You can also add more items to be cooked while there is fire.
-
After a while a product will be ready - cooked food, metal ingots, glass sheets etc. Unless, of course, it was something unsuitable, in which case it will turn into burned mess which you can only throw away.
-
Click the campfire, oven etc. to put out the fire, or leave it burning for light.
Campfire, iron oven and wood stove
Essentially, these three have the same functions - to fire Clay items and to cook (with an added bonus of keeping you warm in winter chill when you are within 1 tile of them). There are two main differences between a campfire, an oven and a stove. The first one is their capacity, i.e. the number of objects they can hold and process simultaneously. You can think about it as a number of ‘production slots’. The second one is the time it takes to cook something in the fire - advanced ovens and stoves are much faster at it than the campfire.
 |
Campfire | Capacity: 2 Cooking time: 30 seconds Made with 4 wood logs. The first sparkle of Civilization, the harbinger of metals and pottery, the omen of a fine cuisine, and so on, and so on. |
 |
Iron oven | Capacity: 3 Cooking time: 5 seconds Made with 8 iron ingots. A potbelly-like containment for fire. |
 |
Wood stove | Capacity: 4 Cooking time: 5 seconds Made with 8 steel sheets. A pinnacle of the fireplace technology (so far...) |
Workbenches and Racks
The appliances used for manufacturing. Some of them require a certain level of the crafting skill before you are able to use them.
Loom
 |
Loom | Made with 8 wood logs. Used to weave cotton and retted fabric into Cloth and to turn shorn wool into Woolcloth. |
Tanning rack
 |
Tanning rack | Made with 8 wood logs, with Basic Toolmaking required where research applies. Put a held stack of washed wet hides on the rack and allow 300 ticks, normally 30 seconds, to dry. Remove the contents with an empty hand; removing wet hides cancels drying without consuming them. A restored wet batch starts a fresh full drying interval after a server restart. The rack produces dry hides, which need bark tannin to become leather. See the full Leather tanning process. |
Retting trough
 |
Retting trough | Made with 8 wood logs. Used to soak fiberous plants into retted fabric. Two units of cotton or flax produce one bundle of retted fabric, which could be turned into Cloth at the loom. |
Acidic bath
 |
Acidic bath | Made with 12 steel sheets. Used to soak raw kevlar into prepared kevlar, which is further formed into kevlar sheets at the loom. Raw kevlar recipe requires mixing sulphuric acid (sulphur, hydrogen, oxygen) and any form of refined fuel (not ground-oil petroleum). Standard Kevlar vests are assembled at an armor assembly workbench (10 soft wood, Weaving research): sew a carrier from 4 cloth and 2 leather, prepare panels from 14 Kevlar sheets, then fit both into the vest (Modern Armor research, Cold War and Modern eras). |
Gunsmithing bench
 |
Gunsmithing bench | Skill required: 1.5 + Blueprint Made with 13 wood logs. Used to assemble custom firearms from separate parts starting from the Early Modern age (1903) and to rechamber guns to a different caliber (click the bench with the gun).
|
 |
Blueprint | Skill required: 2.5 + 50 gold coins (or equivalent) A weapon blueprint is produced every time you design and assemble a firearm at the gunsmithing bench. A blueprint could be used to assemble the previously designed firearm by someone with the lower skill level. |
Stock
| Type | Available | Pros | Cons | Cost |
|---|---|---|---|---|
| Rifle wooden stock | 1903 | Cheap, stable, accurate | Heavy, slow to equip | 7 wood logs |
| Carbine wooden stock | 1903 | Cheap, good stability | Somewhat heavy, less accurate than the rifle stock | 5 wood logs |
| Pistol grip | 1903 | Cheap | Very low stability | 3 steel sheets |
| Steel stock | 1943 | Cheap, stable, faster to equip than wooden stocks | Somewhat heavy | 5 steel sheets |
| Folding stock | 1979 | Switchable between folded and extended | Less accurate than fixed stocks even if extended | 7 steel sheets |
Receiver
| Type | Available | Pros | Cons | Cost |
|---|---|---|---|---|
| Bolt-action | 1903 | Very cheap and accurate | Slow reloading (needs to open and close after each shot) | 5 steel sheets |
| Revolver | 1903 | Cheap | Reloading slower than semi-automatic pistols; feeding system restricted to revolving | 4 steel sheets |
| Small semi-automatic | 1903 | Somewhat cheap, good for pistols | Small range, not very accurate | 6 steel sheets |
| Pump-action | 1903 | Cheap, reloading faster than bolt-action | Somewhat slow reloading; feeding system restricted to tubular | 5 steel sheets |
| Small open bolt | 1943 | Cheapest fully automatic option | Fully automatic only, limited accuracy | 8 steel sheets |
| Large semi-automatic | 1943 | Decent accuracy | Expensive | 8 steel sheets |
| Large open bolt | 1943 | High rate of fire | Very expensive, inaccurate | 11 steel sheets |
| Dual selective fire | 1979 | Switchable between semi- and fully automatic | Very expensive | 13 steel sheets |
| Triple selective fire | 1979 | Switchable between semi-, burst and fully automatic | Very expensive | 15 steel sheets |
Feeding system
| Type | Available | Pros | Cons | Cost |
|---|---|---|---|---|
| Internal magazine | 1903 | Cheap, can be clip-fed | Low capacity (5 rounds) | 4 steel sheets |
| Tubular | 1903 | Cheap, higher capacity than internal magazines (8 rounds) | Slow reloading, cannot use clips | 5 steel sheets |
| Revolving | 1903 | Cheap | Very slow reloading | 3 steel sheets |
| External magazine | 1943 | Fast reloading | Somewhat expensive | 8 steel sheets |
| Large magazine | 1943 | Accepts high-capacity drum magazines | Expensive | 10 steel sheets |
| Open (belt-fed) | 1943 | Very high capacity | Inaccurate and unstable | 6 steel sheets |
Barrel
| Type | Available | Pros | Cons | Cost |
|---|---|---|---|---|
| Pistol | 1903 | Cheap | Lowest range | 4 steel sheets |
| Carbine | 1903 | Faster to equip than rifle barrels, decent accuracy | Low range | 5 steel sheets |
| Rifle | 1903 | Accurate | Somewhat expensive, somewhat slow to equip | 6 steel sheets |
| Long rifle | 1943 | Most accurate | Slow to equip | 7 steel sheets |
| Air-cooled | 1943 | Required for machine guns to prevent frequent jamming | Expensive | 9 steel sheets |
Projectiles and Gunpowder
These serve to truly extend one’s reach.
Arrows
An arrow shaft is made with 1 wood log. Could be launched from a bow, but it is very weak on its own. Make arrowheads via casting in the arrowhead mold and attach them to arrow shafts by clicking. You can set arrows on fire by clicking a lit brazier with them. A vial arrowhead (made out of glass) could be filled with a chemical reagent that will be spilled upon hitting a target.
 Arrow shaft  Fire arrow |
 |
 |
 |
 |
 |
 |
 |
 Stone |
 Sandstone |
 Copper |
 Bronze |
 Iron |
 Steel |
 Vial |
Gunpowder
Gunpowder is produced by mixing mineral coal (carbon, actually), sulphur and saltpeter, 1 unit of each, in a barrel. This produces 9 units of gunpowder. There are alternative ways to acquire ingredients, but for that see the Guide to Chemistry.
Iron projectiles
Musket ball

Blunderbuss ball

Small musket ball

- Make a required type of musket balls with iron ingots. Stand in one place to make them in a single stack.
- Take the stack of projectiles in your active hand, then take a gunpowder container in the non-active hand.
- Click the projectiles to produce a cartridge, 1 unit of gunpowder per 1 cartridge.
Musket cartridge

Blunderbuss cartridge

Pistol cartridge

 Pistol casing |
 Rifle casing |
 Shell casing |
 Field cannon casing |
- Make a required type of casings with copper ingots, or recover fired brass (see below).
- Fill the casings with gunpowder by clicking them with a gunpowder container, 1 unit for pistol casings, 1.5 for rifle and 5 for shell and cannon. Pistol and rifle casings take only what they still need, so a small container can fill them in several pours.
 Iron bullet |
- Make iron bullets with iron ingots. Attach the bullets to the casings by clicking them with the bullets. Each bullet needs a casing that already holds its powder.
- Use the casings in hand and choose the cartridge. Every casing with powder and a bullet becomes a round; the rest stay in the stack. Rifle and pistol rounds can be normal, hollow point or armor-piercing, while shotgun shells have one load.
- Which cartridges you can load depends on your firearms research: Rifling teaches the early revolver, rifle and shotgun rounds, Cartridge Firearms the WW1 rifle and pistol rounds and the machine-gun loads, Self-Loading Firearms the WW2 rounds and Automatic Weapons the modern ones. Belt and strip machine guns take only their machine-gun load. Heavy machine-gun rounds cannot be loaded by hand; they come from a fabricator in ammo cans.
- Splitting or combining a stack of filled casings keeps the powder and bullets with the casings.
Smokeless powder: once you know Cartridge Firearms, you can fill pistol and rifle casings with smokeless powder instead of gunpowder. Each unit counts as two units of gunpowder, so a rifle casing needs 0.75 and a pistol casing 0.5. If the container also holds gunpowder, the smokeless powder is poured first and gunpowder tops up the rest. Smokeless powder needs no sulfur once you have a flask of sulphuric acid:
- Put at least 5 units of sulphuric acid in a beaker first. Without the acid, cotton and saltpeter flash and explode.
- Add cotton and saltpeter (2 cotton to 1 saltpeter) to make guncotton. The acid is not used up, so the same beaker can make batch after batch. A laboratory with nitric acid can use 2 cotton and 1 nitric acid instead.
- Pour the guncotton into another container and add ethanol (2 guncotton to 1 ethanol) to make 3 units of smokeless powder.
Muskets, cannons and musket-ball cartridges still need ordinary gunpowder.
Recovering brass: fired pistol and rifle cartridges, and spent shotgun shells, can be loaded again. Use a spent casing in hand to turn it into an empty casing, or click spent casings (or the tile they lie on) with a stack of empty casings of the same size to gather them all. Shotgun shells count as rifle casings. Live rounds and casings still in a box, magazine or gun are left alone.
Machinery
The steel embodiment of Progress. For belts, arms, fabricators and pipe networks, see Factory Automation.
Engines
The mechanisms that extract and convert the energy contained in various fuels.
Engines could be used dually - as a vehicle engine or as an electric generator. Every type of engine has several key parameters that remain constant, but, for practical purposes, only one key parameter could be taken into account:
- Power per 1 litre (1000 cm3) - the power produced by a given type of engine per every 1000 cc of its size. This is the meaning behind the number in an engine’s description in the list below. For the game mechanic purposes, the value of the engine power is doubled when an engine is installed on a modular vehicle.
The power affects how many pieces of machinery could be powered by an engine if used as a generator, or, if used as a vehicle engine, the maximum weight it could carry.
Engine as a generator
To supply various devices with electricity, the engine has to be connected to them with wires (cables). See the Wiring section for more details.
As a rule of thumb, an engine the size of 1000 cc should be adequate for an average settlement.
Construction
To construct any engine, save for the steam engine (which also does not need a fuel tank), you will need the engine maker (made with 5 iron ingots).
-
Have the engine maker in your active hand and a stack of steel sheets in the other hand.
-
Click the engine maker, or press Ctrl-Z or Z in the hotkeys mode.
-
Choose the engine type. Note that different engines need various amounts of steel per 1000 cc.
-
Enter the size of the engine to build.
-
Build a fuel tank with steel sheets, take it in hand and connect it to the engine by clicking. To remove a fuel tank, right-click the engine and choose the “Remove fuel tank” command.
  |
Iron furnace/Steam engine | Power: 45 | Fuel (iron furnace): wood, branches, coal, charcoal, flammable cloth and wooden items | Available at 95 Industrial research. Made with 15 steel sheets (engine), plus 15 iron ingots (furnace). This engine requires an external combustion source, and that is the function of the iron furnace.
Build both the furnace and the engine, and place them next to each other, in neighbouring tiles. Add fuel to the furnace and click the furnace to light the fire. Now click the steam engine to start it. As long as the furnace has fire burning and remains next to the engine, the engine will keep working. |
 |
Hot bulb engine | Power: 66 | Fuel: oil, gasoline, diesel, biodiesel, ethanol, olive oil, fat oil | |
 |
Diesel engine | Power: 80 | Fuel: diesel | |
 |
Gasoline 4-stroke engine | Power: 100 | Fuel: gasoline |
Refinery
There are two kinds of refinery - petroleum and biofuel.
 |
Petroleum refinery | Production rate: every 10 units of raw petroleum => 8 units of gasoline or 7 units of diesel per 1 minute | Made with 22 steel sheets. Used to distill crude oil into gasoline and diesel. |
|
Biofuel refinery | Production rate: every 10 units of olive oil => 7 units of biodiesel; or every 10 units of ethanol => 10 units of refined ethanol | Made with 18 steel sheets. Used to produce ethanol from alcoholic beverages (the stronger, the more efficient) and biofuel from olive oil. |
Operation
- Construct and wire the refinery.
- Place an empty barrel inside the refinery.
- Fill the refinery with the respective raw substance (maximum volume is 300 units).
- Right-click the refinery and choose the product via the “Set output” command.
- Click the refinery to start it.
- Wait till the product is ready. Click the refinery again to shut it down.
- If the barrel fills up, the refinery stops making product and keeps the unused raw substance until you swap in an empty barrel.
- Right-click the refinery and remove the barrel with the product with the “Remove barrel” command.
Bakelizer
 | Bakelizer | Production rate: every 5 units of raw petroleum => 1 plastic sheet per 1 minute | Made with 18 steel sheets. Used to produce Plastic from raw petroleum. On the tech tree it unlocks with Combustion Engine on the Main tree, alongside the refineries, so factionless players can build it too. |
Operation
- Construct and wire the bakelizer.
- Fill the bakelizer with raw petroleum.
- Click the bakelizer to start it.
- Wait till the product is ready. You can examine the bakelizer to check the current amounts of petroleum and plastics.
- Right-click the bakelizer and remove the produced plastics with the “Remove plastic” command.
- Click the bakelizer again to shut it down.
Wiring
The wonderful world of wires!
Once you have a roaring power generator, it is time for electricity to spring forth and animate the silent apparatus, to spread across the world and become its galvanic soul. Here is the process of laying electrical cables.
 |  |  |  |
| 1 | 2 | 3 | 4 |
-
Make some cables with copper, 1 ingot per every 10 meters of cable (1 m - 1 tile). Stand in one place to make the cable in a single coil, which could be up to 50 m in length.
In tech-tree mode, colored cable recipes require Electricity. The active map catalog, era and character skills also apply. For commissioning, output limits and save behavior of cable batteries, see Power & Batteries.
-
Lay the cable on the ground by clicking it in your active hand, pressing Ctrl-Z or Z in the hotkeys mode.
-
The cable is placed horizontally when you are facing West or East, and vertically, if facing North or South. Laid on a corner tile while facing the new direction, with the run coming in from the side, a piece bends into a corner and joins both ways.
-
If you are placing cables over some kind of floor, the cables are automatically placed under the floor tiles and concealed from view. You can make them visible by right-clicking the floor tile and selecting the “Under/over covers” command for the cable.
-
You can cut and remove cables with the knife.
-
Cables that cross, branch into a T or have different colours do not join on their own. Craft a cable connector (1 copper, electrical section; Electricity research on the tech tree), stand on the tile where the cables meet and use it in hand, or drop it there and fasten it with a wrench. A secured connector joins every cable on its tile, including crossings and different colours. Only one connector fits on a tile; unwrench it to take it back.
-
-
Connect the machinery (you may need to secure it with the wrench first, in which case there will be a message). Stand close to it and click it with the cable - you will see a message. Do not place cables under the machinery beforehand, it will remain unconnected. Remember to place another wire at the tile you are standing on.
-
Fire up the generator! Should a new piece of machinery be connected to the existing network, the generator must be restarted to power the new element.
Electronic circuits
 |
Electronic circuits | Electronic circuits (or electronics) are made from copper and iron (requires 2.2 of the crafting skill). Hold copper ingots in the active hand and iron ingots in the off-hand. Click copper ingots and choose "electronic circuits". Electronics are used to assemble various devices, such as phones and radios, cameras, the Geiger counter, and the TV set. |
Vehicles
Automobile workshop
Research Automobiles and Electricity, then craft an automobile workshop from 30 steel in the production category. Stand where the workshop should go: the 4x4 square to your northeast must be dry, open floor with no walls or fixed structures, and a laid power cable must be on or next to your tile. Small cars (ASNO Piccolino, ASNO Quattroporte and Yamasaki Kazoku) use only the inner 3x3 of that bay. If anything is missing, the workshop is not built and you are told what to fix. Loose items in the bay do not stop the build, but must be moved before assembly.
| Input | Small cars | Large cars |
|---|---|---|
| Steel | 40 | 60 |
| Glass | 6 | 8 |
| Cloth | 4 | 6 |
| Cable | 10 | 10 |
| Unattached wheels | 4 | 4 |
Feed the material stacks into the workshop. Drag four unused, unbroken, unattached wheels onto it, and drag an adjacent laid cable onto it to connect a network with 20 available power. Click the workshop, choose a model and stay adjacent during assembly. Clear loose objects and occupants from the bay. Interrupted work, a blocked bay or lost power leaves assembly inputs unspent; Unload inputs returns unused stock.
The workshop offers all nine layouts: Piccolino, Quattroporte, Erstenklasse, Falcon, Falcon Unmarked, Wyoming, Shinobu, Police Shinobu and Kazoku. Finished cars have empty fuel tanks and need fuel accepted by their engine; manufacturing does not supply loose map accessories. Stock survives saves, but reconnect cable power after loading.
Building a car piece by piece
Instead of feeding everything in at once, a car can be built a piece at a time, by as many people as want to help. Click the workshop and choose Start a MODEL piece by piece with the 4x4 bay clear. An assembly jig appears in the bay, and the car grows on it from the back to the front as pieces are fitted.
| Stage | Pieces | Each piece needs (small / large car) |
|---|---|---|
| Chassis | 2 | 8 / 12 steel |
| Wheels | 4 | one unattached wheel |
| Engine | 1 | 8 / 12 steel and 10 cable |
| Bodywork | 2 | 8 / 12 steel |
| Windows | 1 | 6 / 8 glass |
| Seats | 1 | 4 / 6 cloth |
Hit the workshop or any part of the car in the bay with the stack the next piece needs, and drag wheels onto either. A short stack is set aside towards the piece, and a long one keeps what it does not use. Examine the workshop or the car to see what the next piece needs. Fitting pieces needs no power. When the last piece is on, clear the bay of people and loose items, then choose Roll out. This draws 20 power like an ordinary assembly, and the car comes out with its key and an empty tank. A car built this way costs the same as one built in one go. A half-built car survives saves. Abandon clears the jig, and everything fitted so far is lost.
Trucks, carriers and tanks
The workshop also builds eleven heavier or military vehicles. They are only built piece by piece, the same way as a car: choose Start a MODEL piece by piece and bring each piece in turn. The scout car, field car, cargo truck and double-decker bus need only the workshop’s own research. The main battle tank needs Modern Armor, and the rest need Mechanized Warfare, before the project can start.
| Model | Size | Chassis and bodywork (4 pieces, each) | Running gear | Engine | Windows | Seats | Turret and gun | Total steel |
|---|---|---|---|---|---|---|---|---|
| Scout car | 2x3 | 10 steel | 4 wheels | 10 steel, 10 cable | 4 glass | 4 cloth | - | 50 |
| Field car | 2x3 | 14 steel | 4 wheels | 14 steel, 10 cable | 6 glass | 4 cloth | - | 70 |
| Cargo truck | 2x4 | 22 steel | 4 wheels | 22 steel, 10 cable | 8 glass | 6 cloth | - | 110 |
| Double-decker bus | 2x5 | 22 steel | 4 wheels | 22 steel, 12 cable | 14 glass | 10 cloth | - | 110 |
| Armoured car | 2x3 | 24 steel | 4 wheels | 24 steel, 10 cable | - | 4 cloth | - | 120 |
| Tankette | 2x3 | 28 steel | 4 tank tracks | 28 steel, 10 cable | - | 4 cloth | - | 140 |
| Tracked carrier | 3x4 | 36 steel | 4 tank tracks | 36 steel, 12 cable | - | 6 cloth | - | 180 |
| Light tank | 2x4 | 30 steel | 4 tank tracks | 30 steel, 12 cable | - | 4 cloth | 70 steel | 220 |
| Medium tank | 3x4 | 46 steel | 4 tank tracks | 46 steel, 14 cable | - | 6 cloth | 70 steel | 300 |
| Heavy tank | 3x4 | 62 steel | 4 tank tracks | 62 steel, 14 cable | - | 6 cloth | 70 steel | 380 |
| Main battle tank | 3x4 | 78 steel | 4 tank tracks | 78 steel, 16 cable | - | 6 cloth | 70 steel | 460 |
The double-decker bus is longer than the usual bay: its project needs a clear 5x5 square to the workshop’s northeast. Stairs inside it lead up to the upper deck: stand on them and click them to go up, and click them again from above to come back down. See Combat for riding on top of vehicles.
Tracked models take tank tracks in place of wheels: craft them from steel in the vehicle parts category and drag each one onto the workshop or the vehicle. A rubber wheel will not do for a track. The turret and gun are the last piece of a tank.
Like cars, they roll out with a key and an empty fuel tank. Shell racks come empty and no machine guns, ammunition or supplies are included, so bring your own shells and fuel before you take a tank out.
A tank’s turret is the same tank turret players craft, already fitted with a tank cannon and a gunner’s and a loader’s seat. Every vehicle in this table counts as hand-built, so its owners can click the axis to pick a Turret style, Fit new parts such as a commander’s seat stood on the turret’s tile, or Take it apart and rebuild it, as described under Modular tanks.
Vehicle garage
Once you have Automobiles, you can craft a vehicle garage from 20 steel in the production category. It is a control post with a 4x4 parking bay to its northeast, and it holds up to 3 cars. Storing a car takes it off the map until you take it out again.
- Drive the car into the bay so the whole car is on the 4x4 square. Then stop, switch the engine off and get everyone out. Roads under the bay are fine, but take loose items off the car, and leave items in the boot where they are.
- Click the post and choose Put away the parked vehicle. Stay next to the post for a few seconds while the car rolls in.
- To take the car out, clear the bay and choose Take a vehicle out. The car comes back where it was parked, with the same fuel, damage, number plate and boot cargo.
You need to hold the car’s key to put it away and to take it out. Examine the post to see what it holds. Stored cars survive saves, so a car in a garage is safe from thieves and weather until you come back for it. The garage takes cars only. Planes go in the aircraft hangar.
Safe house depot
Once you have Carts, you can craft a safe house depot from 20 soft wood in the logistics category. It ships goods off to your safe house: your faction’s, or your own if you have no faction. Shipped goods leave the map until you recall them, so they cannot rot, burn or be stolen, and they survive saves.
- Hold an item, or push a closed crate next to the depot.
- Click the depot and choose Ship what you hold or Ship a crate next to the depot. Stay beside it for a few seconds.
- To get goods back, choose Recall a shipment. It appears at your feet, inside the same kind of crate if it went in one.
Every depot in a land opens onto the same safe house, so you can ship at one and recall at another. A party keeps up to 20 shipments (more with a stash, below), and nobody outside your party can see or take them. Depots cannot be taken apart, burned or blown up. Examine a depot to see what your safe house holds. What can be shipped is the same as for train freight.
Safe house rooms
Your safe house has six rooms, and you can build each one up to level 3. Click a depot and choose Safe house rooms and work. The supplies come from what you hold and from closed crates pushed next to the depot. They are taken as soon as you pick an upgrade or a job.
| Room | Level 1 | Level 2 | Level 3 | What it does |
|---|---|---|---|---|
| Stash | 30 wood | 30 wood, 20 iron | 10 iron, 20 steel | keeps 10 more shipments per level (up to 50) |
| Workshop | 20 wood, 20 stone | 20 iron, a hammer | 20 steel, a wrench | smelts iron; makes steel; casts bullets and draws rifle casings |
| Infirmary | 20 wood, 10 cloth | 20 cloth, 10 glass | 10 steel, 20 glass | rolls bandages or gauze; carves splints; packs trauma kits |
| Kitchen | 20 wood, 20 stone | 10 iron, 20 stone | 10 steel, 10 glass | dries meat; bakes hardtack; cures hams |
| Still | 20 wood, 10 copper | 20 copper, 10 glass | 10 steel, 20 glass | brews beer; distils vodka; distils whiskey |
| Contacts desk | 10 wood, 100 silver coins | 50 gold coins | 150 gold coins | 5% better prices per level from the specialist traders, when you buy and when you sell |
Each level of the workshop, infirmary, kitchen and still unlocks one more kind of work:
| Work | Room level | Takes | Makes | Time |
|---|---|---|---|---|
| Smelt iron | Workshop 1 | 10 iron ore, 5 coal | 8 iron | 20 min |
| Make steel | Workshop 2 | 5 iron, 5 coal | 5 steel | 40 min |
| Cast bullets | Workshop 3 | 5 lead | 30 bullets | 30 min |
| Draw rifle casings | Workshop 3 | 5 copper | 30 rifle casings | 30 min |
| Roll bandages (gauze from the WW1 era on) | Infirmary 1 | 4 cloth | 10 bandages or gauze | 20 min |
| Carve splints | Infirmary 2 | 5 wood, 2 cloth | 4 splints | 20 min |
| Pack trauma kits | Infirmary 3 | 10 gauze, 5 cloth | 2 trauma kits | 60 min |
| Dry meat | Kitchen 1 | 3 meat | 3 dried meat | 30 min |
| Bake hardtack | Kitchen 2 | 4 wheat | 4 hardtack | 30 min |
| Cure a ham | Kitchen 3 | 5 meat | 1 cured ham | 120 min |
| Brew beer | Still 1 | 4 wheat | 2 bottles of beer | 60 min |
| Distil vodka | Still 2 | 6 potatoes | 1 bottle of vodka | 90 min |
| Distil whiskey | Still 3 | 6 wheat | 1 bottle of whiskey | 120 min |
Work runs in real time, so it carries on while you are offline. Each room does one job at a time. When work is done, choose Collect finished work at any depot in the land, and the goods appear at your feet. Some work only shows up in the right age or once your people have the matching research.
Pedal bicycles
A pedal bicycle is a one-person vehicle that runs on your own legs: no engine, no fuel. Build it from 8 steel, two wheels and a drive belt or chain, with a wrench to hand, in the “vehicle parts” category. The wheels and the belt are machine parts and can be in your other hand or at your feet. Built from 8 aluminium instead, the bicycle is about 15% quicker. A wooden running bike (6 wood and two wheels, Carts research) has no pedals: you ride it the same way, more slowly. It needs the Factories node of the tech tree (legacy research: Industrial 95).
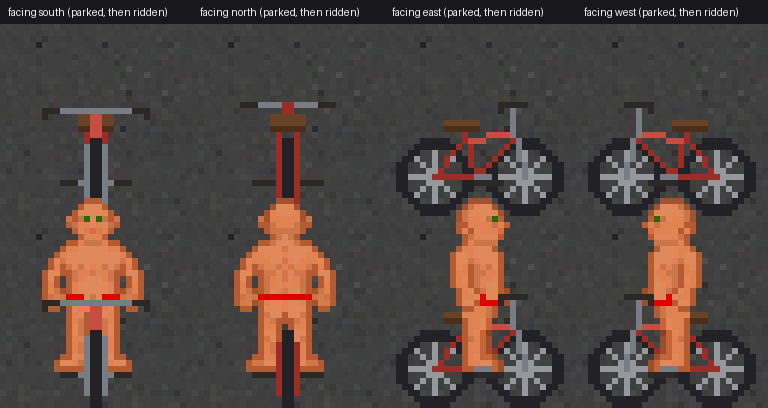
The bicycle parked (top) and ridden (bottom). Offline render using Civ13 sprites, not a live screenshot.
- With one hand free, click-drag your character onto the bicycle. You take the handlebars in that hand.
- Press Z (use the handlebars) to start pedaling, and steer with the direction keys. The bicycle keeps rolling the way you face, gliding smoothly rather than jumping from tile to tile. When you turn it keeps its sideways place, so you can line it up anywhere.
- Press C, or Z again, to brake. Click the bicycle to get off.
What makes it fast or slow:
| Condition | Effect |
|---|---|
| Roads, built floors, tamped earth | Full pace: a little quicker than running, for half the stamina. A car or a large motorcycle is faster still |
| Grass, dirt, sand and other natural ground | A quarter slower and a quarter more tiring |
| Lying snow | Slower still |
| Carried weight | The more you wear and carry, bags included, the slower you go and the more stamina each tile costs. At your full carrying capacity the bicycle takes twice as long per tile, and it bottoms out at four times |
| Uphill | Slower, more so the steeper it is, and more stamina for each level climbed |
| Downhill | Quicker, and coasting costs no stamina |
Pedaling stops when you run out of stamina, let go of the handlebars, or meet something in the way. Bumping into things does not hurt you or the bicycle. It cannot cross water without a bridge; a pedal airship can. You need both legs and feet, and you cannot pedal while cuffed.
Pedal airships
A pedal airship is a one-person gas bag over a basket, with a propeller you turn with your own legs. Build it from 30 cloth in the “vehicle parts” category. It needs the Factories node of the tech tree (legacy research: Industrial 95). It only flies where aircraft can; anywhere else it stays on the ground.
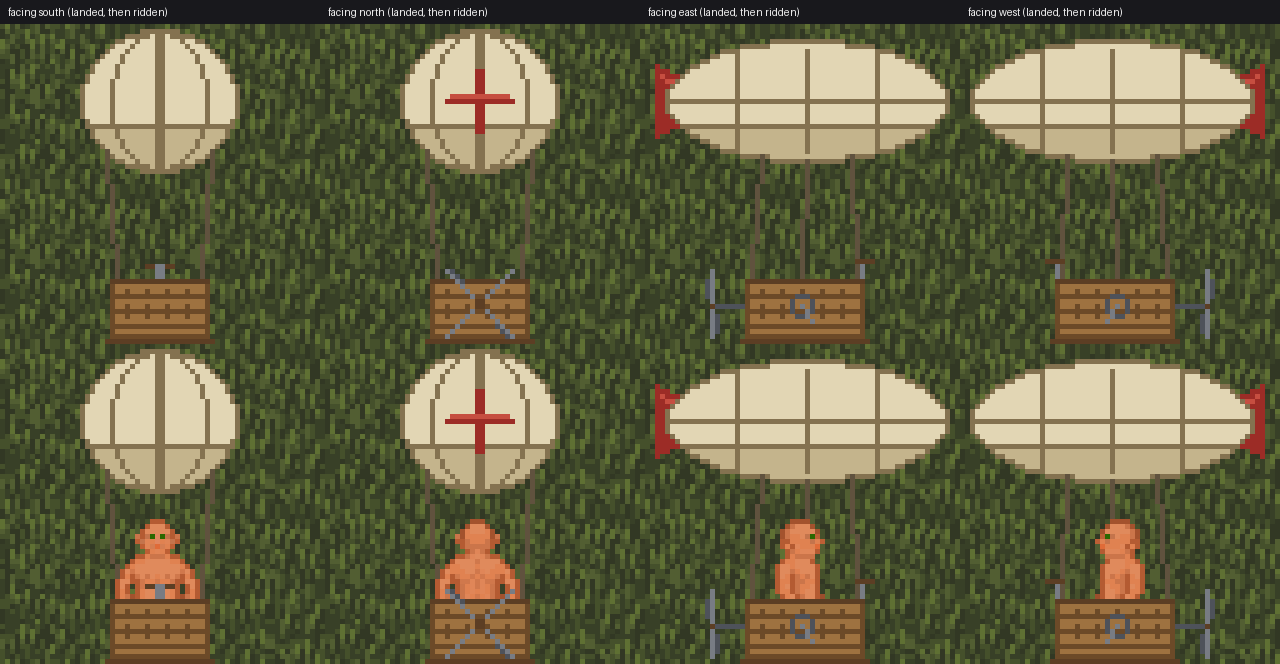
The airship landed (top) and ridden (bottom). Offline render using Civ13 sprites, not a live screenshot.
- With one hand free, click-drag your character onto the airship. You take the tiller in that hand.
- Press C to rise. It takes a few seconds and a little stamina, and needs open sky straight above: no roof or upper floor.
- Press Z (use the tiller) to start pedaling, and steer with the direction keys. The propeller does nothing on the ground.
- Press C, or Z again, to stop. The airship hangs where it is.
- Stopped in the air, press C to sink. You need dry, clear ground straight below: not water, a trench, a wall or another person.
- Back on the ground, click the airship to get off. You cannot get off in the air.
| Condition | Effect |
|---|---|
| Pace | About half the bicycle’s best pace, and the same over water, walls, forest and hills |
| Carried weight | The more you wear and carry, bags included, the slower it flies and the more stamina each tile costs. At your full carrying capacity it takes twice as long per tile |
| Too much weight | It cannot lift more than you could carry on foot. Drop something and try again |
| Upper floors and the map edge | It stops in front of them, unharmed |
| Out of stamina | You stop pedaling and hover until you have rested |
The airship never drops you. If you are pulled from the seat or killed in the air, or the airship is destroyed, it drifts down to the nearest clear ground and nobody is hurt by the landing. Things you drop from it do fall. You need both legs and feet, and you cannot pedal while cuffed.
Motorcycles
It is 1903, eh? You got gas, a refinery, even gas pumps, but no vehicles? Well, you are in luck, now you will learn you all the inner workings of creating your very own motorcycle! Just set aside a bunch of steel and follow the steps below.
 |  |  |  |  |
| 1 | 2 | 3 | 4 | 5 |
- Build a motorcycle frame with 12 steel sheets (“vehicle parts” category). Choose name and colour for the bike (you may like #5C573D - “#” is not required).
- Next, you need to build an engine. Make an engine that is 125 cc at most. Only 125 cc or lower can be put into a bike, otherwise it will not fit. Choose from 2- and 4-stroke engines, all others are too large.
- Now you need to slap whatever engine you made into that sweet sweet frame of the bike. Simply click the engine icon and drag it onto the bike.
- All that is left then to add is a fuel tank. You can build one with steel sheets (“fuel tanks” category). You have 3 choices. 75 u bike tank is the biggest. Build bike tanks, fuel tanks will not fit. Then take the bike tank and click on the bike to install that baby.
- Now you have successfully made a motorcycle. What you named it? No one cares. Who you made it for? No one cares, they will likely steal it anyway. However, you are the man with the fuel (hopefully)! Hop on and ride!
Motorcycle operation
Bikes have 4 speeds. Stopped (neutral), 1st gear (moving slowly), 2nd gear (moving faster than the 1st), and 3rd gear (fastest - you crash on this speed, you are sure to break something).
Mount your bike by click-dragging your icon onto the bike. You can get off by clicking on the bike with the handle bars in hand (this also shuts off the bike. Two clicks - shut off the bike, then another on to get off).You turn on/increase speed of the bike by pressing Z. You can stop/decrease speed by pressing C. The bike glides smoothly instead of jumping tile by tile. When you turn, it keeps its sideways place, so you can park it anywhere. Taken out of gear, it rolls on for about half a tile before it stops. Drive safe out there!
Modular ships
Ships are built tile by tile from ship frames, walls, masts or an engine, a wheel and a rudder axis. Rafts, outriggers and motorboats are simpler. See Boats & Ships for every boat, the parts each one needs, the helm controls and how the wind affects sailing.
Aircraft hangar
Research Powered Flight, then craft an aircraft hangar from 40 steel in the production category. It works like the automobile workshop, with a 4x4 bay to its northeast and 20 power from a cable, and is refused the same way when the bay or cable is missing, and builds a light plane (50 steel, 6 glass, 4 cloth, 8 cable and 4 wheels), a cabin plane, a small trainer, a cargo plane or a twin-engine plane (in a 5x5 square). It can also store up to 2 planes off the map. Runway is laid from 1 stone per tile in the roads category. Planes can also be built by hand from airframe sections, airframe controls and a pilot’s seat (vehicle parts, Powered Flight), and towed on the ground behind a truck. See Aircraft for building, flying and landing.
Modular tanks
Indispensable political instruments in later ages, perfectly suited for settling disputes and establishing accord on all fronts.
Tank driving is covered in the Guide to Tanks.
Limitations
-
A tank is at least 2x2 and at most 5x5 tiles, with 25 frames at most.
-
A tank has to be a rectangle with a frame on every tile. Loose frames that touch count as one vehicle, so build two vehicles a tile apart.
-
You choose which way the tank faces when you assemble it.
 |  |  |  |
| 1 | 2 | 3 | 4 |
 |  |  |  |
| 5 | 6 | 7 | 8 |
Everything inside the tank, except for the tank tracks and the vehicle axis, could be placed anywhere.
You can fix the walls and frames and the tank cannon in place with the wrench to avoid pushing them on accident, but it is not necessary.
-
Build a steel vehicle frame with steel sheets. The frame on the picture is 3x4 tiles.
-
Click vehicle frame tiles with steel sheets to place walls and doors. Enter the desired armour thickness in millimeters.
- Armoured Front (AF) - stronger than the regular wall.
- Wall (W) - a steel impassable wall.
- Door (D) - used to enter or exit the vehicle. Could be locked with a key.
-
Place a tank track (or a wheel) on each of the four corner frames. Tracks on other frames are left out.
-
Construct an engine with a fuel tank.
-
It is important to make an engine of an appropriate size that produces enough power to carry a tank and its load. A weak engine will not be able to move the weight of a tank. You can check engine’s maximum power by examining the engine. For instance, the weight of the tank built here is approximately 650 without any crew or shells. You can check the current weight by examining the steel frame inside the tank (“floor”) once its construction has been finished.
-
As a rule of thumb, an engine of 8000-10000 cc should be more than enough for a medium-sized tank.
-
-
Place the tank cannon (enter the desired caliber) and the seats: D - driver, C - commander, L - loader, G - gunner.
- For a turret that turns on its own, build a tank turret (30 steel, weapons category, Mechanized War) on one of the frames, and put the tank cannon and the gunner’s, loader’s and commander’s seats on the same tile. They are fitted into the turret when you assemble the tank. An emplaced machine gun stood on that tile is fitted too, as the turret’s second gun. Examine the turret to see what it holds and what it still needs: it cannot fire without a cannon or a machine gun, and a gunner’s seat. After assembly, click the axis and choose Turret style to pick how the turret looks.
-
Build a vehicle axis on any frame of the tank and click it. It shows a build sheet: the size of the frame, the parts it found, and what the tank still needs before it will drive (an engine, a fuel tank, a driver’s seat, a wheel or track on each corner). If the frames cannot be a vehicle, it says why. Choose Assemble it, then pick which way the front points, a name and a colour. The light axis carries 800 weight and the heavy axis 2500.
- Parts you add later: stand them on the tank’s frames, click the axis and choose Fit new parts.
- An emplaced machine gun pushed onto any frame rides along with the tank and is manned from behind, as on the ground.
- To change the tank, stop it, switch the engine off, click the axis and choose Take it apart. Frames and parts stay where they stand, loose, and can be assembled again. A tank registered in its vehicle papers can only be taken apart by its owners.
-
Admire the interior of the death machine you have created (place a shell rack, the one beside the fuel tank, to keep things organized)…
-
… and the exterior.
Repairs
- Broken tank tracks could be repaired with the welding tool (made with steel.)