It is truly a marvel, that from this dusty dirt under our feet, these heaps of rugged stones and those chaotically growing trees could spring such smooth, even walls in all their rectangular glory. A natural landscape is a wild beast that needs to be reined in, and reined in it will be!
Construction requires basic knowledge in other areas, such as resource acquirement, which are covered in the Guide to Crafting.
There are a few key elements in the area of construction that you could combine and rearrange as you see fit to raise buildings, lay roads and develop infrastructure as a whole that is both functional and pleasing to the eye. These elements are walls, floors, doors, windows, roofs and barricades along with fences. There are also somewhat distinct categories of fortifications and lighting.
To look for specific items, use the “Find in page” command - Ctrl-F.
Mind that the orientation of some constructions depends on the direction your character is facing! For example, some walls are built vertically if you are facing North or South, or horizontally, if you are facing East or West. Some wall types also have separate corner elements for better appearance. All of this is marked in the description of a specific construction. N, S, W, E mean you need to be facing either North, South, West and East to build a wall the same as the image; All means the construction will look the same regardless of the direction.
Some wall tiles change their appearance depending on the neighbouring walls of the same type, so they connect seamlessly to each other. These walls are marked as Adaptive.
A few more details about particular materials.
Dig any dirt tiles with a shovel to get dirt piles.
Fill a container (a bucket, a barrel etc.) with water, then click dirt piles with it.
10 units of water + 1 dirt pile = 1 clay
Most bricks and blocks are made with Clay, except for stone bricks:
First, make batches of unfired bricks.
Put the unfired bricks in either a campfire, an oven or a stove.
Cook until done.
Hover the mouse cursor over the icon to see the material cost.
 Clay blocks Clay blocks |
 Clay bricks Clay bricks |
 Cement bricks Cement bricks |
 Stone bricks Stone bricks |
Deconstruction
Any kind of wood walls could be set on fire by hitting them with a torch. A wall will burn down in a few minutes, destroying the roof tiles supported by the wall as well (more in the Roofs section). Remove the grass and the wood floor around the wall if you are going to burn it! Otherwise the fire will very likely spread from the burning wall.
Another way is simple brute force - hit a wall with melee weapons, and it will go down sooner or later. Stone walls, the strongest ones, take around 100 hits to bring down, or fewer if your strength is high and you apply a weapon with high damage.
Straw
Made with 4 wood logs. Very primitive, but it still provides shelter, if a flimsy one.
 All
All |
Log
Made with 6 wood logs. A sturdy wall, if slightly crude. Corner is the same for all directions.
 N, S
N, S  W, E
W, E  Corner
 |
Wood
Made with 10 wood planks attached to a wall frame. Being out of planks, this wall is more refined than the log one.


 |
| Adaptive |
Wall frame
Made with 1 wooden plank. Used as a base to build various walls, windows, doors and doorways, such as medieval and shoji. More details below.
 All
All |
Bamboo wall frame
Made with 1 bamboo. Used as a base to build various walls, windows, doors and doorways, such as bamboo and oriental. More details below.
 All
All |
Medieval
Made with 6 clay. A timber frame wall that comes in several designs. To build, construct a wall frame first, then click it with clay and choose a design.

|
| Adaptive |
Shoji
Made with 1 paper sheet. A light paper wall, hailing from Japan. Divider is meant for the interior of a building (this is important.) To build, construct a wall frame first, then click it with a paper sheet.
 Wall
Wall
 Divider
 |
| All |
Bamboo
Made with bamboo: wall - 3 bundles, doorway - 2. Fits in nicely with the jungle surroundings. To build, construct a bamboo wall frame first, then click it with bamboo bundles.
 Wall
Wall
 Doorway
 |
| All |
Oriental
Made with 6 wood logs. To build, construct a bamboo wall frame first, then click it with wood logs and choose a design.
 Regular
 |
 Braced
 |
 Two panelled
 |
 Two panelled braced
 |
 Three panelled
 |
 Three panelled braced
 |
 Doorway
 |
| All | ||||||
Aztec
Made with 8 wood logs. Useful for creating your very own altepetl.


 |
| Adaptive |
Mayan
Made with 6 stones.


 |
| Adaptive |
Egyptian
Made with 6 sandstones.


 For the archway, directions N and W are also available (icons will be
mirrored accordingly.)
For the archway, directions N and W are also available (icons will be
mirrored accordingly.)


 |

 |
| Adaptive | S E |
Nordic
Made with 8 wood logs. For all your Långhus and mead hall needs.


 |
| Adaptive |
Roman
Made with 8 stones. Opus caementicium usque in sempiternum.


 |
| Adaptive |
Dirt block
A slightly dull, yet fairly useful material. Take a pile of dirt in your hand and click it, or press Ctrl-Z or Z in the hotkeys mode. This will start building a wall where you stand. Add 3 more piles to finish.
 All
All |
Snow block
Perfect for igloos. Take a pile of snow in your hand and click it, or press Ctrl-Z or Z in the hotkeys mode. This will start building a wall where you stand. Add 3 more piles to finish.
 All
All |
Clay block
One step above the dirt blocks. Take 1 batch of clay blocks in your hand and click it, or press Ctrl-Z or Z in the hotkeys mode. Select clay blocks. This will start building a wall where you stand. Add 2 more batches to finish.
 Wall
Wall
 Doorway
 |
| All |
Red earth
Made by applying 1 portion of generic stucco (made with 1.5 pieces of clay) to a clay block wall. Click the wall with the stucco, then select the design.
The doorway is made by applying generic stucco to a clay block doorway.
 Regular
 Pillared
 Smooth
 Doorway
 |
Sumerian
Stylish architecture, dating thousands of years BC. Take 1 batch of clay blocks in your hand and click it, or press Ctrl-Z or Z in the hotkeys mode. Select Sumerian clay. This will start building a wall where you stand. Add 2 more batches to finish. When finishing, you will be prompted to choose a wall type, normal or corner, or to make it a doorway. Corner could be chosen for 4 directions, NW, NE, SW, SE. The image below is NW.
 Wall
Wall
 Doorway
 Corner
 |
| All |
Sandstone
Made with 8 sandstones.
 Smooth
 |
| All |
Sandstone block
Made with 8 sandstones. For the archway, directions N and W are also available (icons will be mirrored accordingly.)


 |

 |
| Adaptive | S E |
Red sandstone block
Made with 8 sandstones. For the archway, directions N and W are also available (icons will be mirrored accordingly.)


 |

 |
| Adaptive | S E |
Sandstone fortress
Made with 8 sandstones and 8 stones.


 |
| Adaptive |
Stone
Made with 8 stones. Use a chisel with a hammer to carve it into different designs.
 Regular
 Brick
Brick
 Cobbled
 Tiled
Tiled |
| All |
Stone block
Made with 8 stones. For the archway, directions N and W are also available (icons will be mirrored accordingly.)


 |

 |
| Adaptive | S E |
Grecian
Made by applying 1 portion of Greek stucco (made with 1.5 pieces of clay) to a stone block wall. Click the wall with the stucco, then select the design. Each design has a “bordered” option, which has a noticeable outline. The pattern designs are also available in horizontal orientation.
The archway is made by applying Greek stucco to a stone block archway.
 Smooth
 |
 Cobbled
 |
 Pattern
 |
 Cob. pattern
 |
 Archway
 |
 |
 |
 |
 |
|
| Bordered | ||||
| All |
Roman villa
Made by applying 1 portion of Roman stucco (made with 1.5 pieces of clay) to a stone block wall. Click the wall with the stucco, then select the design.
 Regular
 |
 Pillared
 |
 Relief
 |
 Hoplite rel.
 |
 Aquila rel.
 |
 Gladiator rel.
 |
Stone brick
Made with 6 stone bricks, which are made from regular stone. For the archway, directions N and W are also available (icons will be mirrored accordingly.)


 |

 |
| Adaptive | S E |
Fortress
Made with 8 stones. One of the strongest walls. For the archway, directions N and W are also available (icons will be mirrored accordingly.)


 |

 |
| Adaptive | S E |
Marble
Made with 8 marble.
 Regular
 |
| All |
Marble block
Made with 8 marble. For the archway, directions N and W are also available (icons will be mirrored accordingly.)


 |

 |
| Adaptive | S E |
Grecian marble
Made with 6 marble. For the archway, directions N and W are also available (icons will be mirrored accordingly.)


 |
 |
| Adaptive | S E |
Clay brick
An advanced construction material. Take 1 batch of clay bricks in your hand and click it, or press Ctrl-Z or Z in the hotkeys mode. This will start building a wall where you stand. Add 1 more batch to finish.


 |
| Adaptive |
Cement
A modern, no-frills, but very strong construction material. Take 1 batch of cement bricks in your hand and click it, or press Ctrl-Z or Z in the hotkeys mode. This will start building a wall where you stand. Add 1 more batch to finish.


 |
| Adaptive |
Roofs provide shelter from bad weather, e.g. rains, blizzards and sandstorms, as well as a nice cool shade.
Roofs are supported by walls, wooden roof supports and stone pillars and columns. Wooden mine supports do not hold the buildable roof!
 Roof support
 |
 Nordic roof support
 |
 Stone pillar
 |
 Concrete pillar
 |
 Ionic column
 |
 Solomonic column
 |
 Thick Solomonic column
 |
 Aztec column
 |
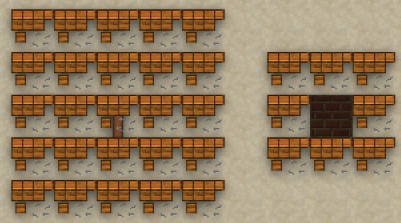
The image below shows the roof area supported by either a roof support (pillars and columns support the same area) or a wall (all walls support the same area.)
There is a variety of roofs to build from different materials (see below - hover the mouse cursor over a roof builder’s icon to see the cost and the material). Roof icons are adaptive, similarly to some of the walls, so they change their appearance, depending on the roof in neighbouring tiles.
To construct a roof, take a respective roof builder and either click it in your hand, or press Ctrl-Z or Z in the hotkeys mode. A roof tile will be constructed in the tile in front of you, the one you are facing, if there is a suitable support nearby.
To deconstruct a roof, click it with the hammer. Either stand outside the roof, so you can see it, or hold Alt and click the tile with the roof. An additional “Turf” tab will appear in the upper right corner - click the roof there with the hammer in the active hand.
If roof supports are removed with the roof still present, the roof will collapse! Collapsing roof may severely injure and even kill those in the roofed area, or even standing next to it.
| 1 bundle of palm leaves |  |
Palm leaves roof builder |  |
Palm leaves roof |
| 1 bundle of leaves |  |
Thatch roof builder |  |
Thatch roof |
| 1 wood |  |
Roof builder |  |
Wood roof |
| 0.5 clay |  |
Clay roofing |  |
Clay roof |
| 0.5 clay |  |
Black clay roofing |  |
Kerawa roof |
| 1 sandstone |  |
Sandstone roof builder |  |
Sandstone roof |
| 1 stone |  |
Mayan roof builder |  |
Mayan roof |
| 0.75 clay |  |
Concrete roof builder |  |
Concrete roof |
No more sloshing or plodding through the mud and snow! Walk the civilized way, swiftly and with resonant “top-top” footfalls! Not only that - floors on the surface prevent digging upwards from the underground. Floors can be removed with the hammer.
 |
Floor cover | Made with 2 wood logs. The simplest type of floor, consisting of a few planks fastened together. Could be placed over a trench to make a bridge, or over a hole in the floor or ground to cover it (the latter concerns a couple of the TDM maps.) |
The floors below are essentially identical, save for the appearance, with a special note being that the wood floor could be set on fire. Hover the mouse cursor over an image to see the cost and the material.
Bamboo floors
 |
Tatami horizontal |  |
Tatami vertical |  |
Tatami dark horizontal |  |
Tatami dark vertical |
Wood floors
 Wood Wood |
 Fancy wood Fancy wood |
 Thatch Thatch |
 Thatch split Thatch split |
Stone floors
 Cobblestone Cobblestone |
 Stone brick Stone brick |
 Roman road Roman road |
 Slate Slate |
 Road Road |
Marble floors
Raw marble and marble tiles (except for ornate and grid tiles) floors each have a few versions that have a slightly different look, which are randomly selected upon construction.
 | Raw marble |  | Raw black marble |  | Raw pink marble |  | Marble |
 | Marble tiles |  | Black marble tiles |  | Pink marble tiles |  | Ornate marble tile |
 | Ornate black marble tile |  | Decorative marble tile |  | Decorative black marble tile |  | Decorative pink marble tile |
 | Marble grid tile |  | Marble checkerboard |  | Reverse marble checkerboard |  | Pink marble checkerboard |
 | Reverse pink marble checkerboard |
Sandstone floors
 | Sandstone |  | Brick |  | Slab |  | Red slab |
 | Tile |  | Decorative tile |  | Red decorative tile |
Clay floors
 Concrete Concrete |
Steel floors
 Steel
Steel
 Steel white
 |
Stairs
At the moment, craftable stairs are purely cosmetic and cannot be used to travel between different Z levels. Nevertheless, they still could be used to create an impression of height difference.
 Stone
Stone |
 Sandstone
 |
 Wood
Wood |
Stairs on the images are built while facing S; directions N, W, E are also available. Hover the mouse cursor over the images to see the cost and the material.
Hover the mouse cursor over the images to see the cost, the material and the direction (how it looks when built while facing either N, S, W or E. “All” means a door always looks the same.)
Only the doors marked as “locked” in the crafting menu could be locked with a key (the iron and jail doors currently) - more details below.
 | Primitive fence door |  | Picket wood fence door |  | Rustic door |  | Wood door |
 | Privacy door |  | House door |  | Nordic door |  | Aztec door |
; direction - All") | Shoji door |  | Roman door |  | Iron door |  | Double doors |
 | Wood jail door |  | Steel jail door |
  | Key and keychain | Key and keychain are made with iron ingots. Keys are used to lock certain doors, wooden cabinets, crates, lockers and large barrels - click them with the key.
|
A window frame is built first. To add glass, click the window frame with 3 glass sheets.
Hover the mouse cursor over the images below to see the material cost and additional details.
 | Wood | ") | Medieval | ") | Shoji | ") | Bamboo | ") | Oriental |  | Stone |  | Full stone |  | Villa |
 | Full villa |  | Full red earth | ") | Sumerian |  | Sandstone |  | Full sandstone | ") | Brick | ") | Full brick |
Fences
The appearance of the primitive wood and picket wood fences is slightly random and may differ from the icons below.
 W,E
W,E |
 N
N |
 S
S |
 W,E
W,E |
 N
N |
 S
S |
 W
W |
 E
E |
 N
N |
 S
S |
| Primitive wood | Picket wood | Wood palisade | |||||||
 W
W |
 E
E |
 N,S
N,S |
 W,E
W,E |
 N,S
N,S |
|||||
| Iron fence | Chainlink fence | ||||||||
 All
All |
 All
All |
||||||||
| Wood jail bars | Steel jail bars | ||||||||
Barricades
Dirt and snow - take a pile of respective material in your hand and click one of the tiles next to the tile you are standing on. This will start building a barricade at the adjacent tile. Add 3 more piles to finish it.
Rock - crafted with 3 stone.
Sandbag - make sandbags with Cloth, then build the barricade like a dirt/snow one.
All barricades could be dismantled by clicking them with an empty hand.
Barricades provide some protection from ranged attacks when you stand right next to and behind them.
 W
W |
 E
E |
 N
N |
 S
S |
 W
W |
 E
E |
 N
N |
 S
S |
 W
W |
 E
E |
 N
N |
 S
S |
| Dirt | Snow | Rock | |||||||||
 W
W |
 E
E |
 N
N |
 S
S |
||||||||
| Sandbag | |||||||||||
Barriers
Barbwire - make barbwire rolls with iron ingots, then build the barrier with the rolls themselves. Could be cut with the wirecutters.
Jersey barrier - made with 3 stone.
 W
W |
 E
E |
 N
N |
 S
S |
 W
W |
 E
E |
 N
N |
 S
S |
| Barbwire | Jersey barrier | ||||||
It is not a proper Civilization until you can see city lights from space!
Electric lights need to be connected to an engine to work. While connecting an electric light to a cable, do not stand on the same tile where the light is. Stand on a neighbouring tile where there is cable on the floor and click the light with the cable coil. This will connect the light to the cable on the floor.
Remember to restart the engine to power newly connected lights to the existing power network.
 |
Street lamp | Made with 3 steel. No more bumping into your fellow neighbours in the dark street. Can be unsecured with the wrench. |
 |
Light bulb | Made with 2 glass. Choose small lightbulb frame in the crafting menu to build a fixture along with a bulb. It is built in front of the character, so if you want a lighbulb on a wall, for example, face it beforehand. Can be unsecured with the wrench and deconstructed with a hammer. The lightbulb option on the crafting menu makes only the bulb itself. |
 |
Light tube | Made with 3 glass. Choose light tube frame in the crafting menu to build a fixture along with a tube. It is built in front of the character, so if you want a light tube on a wall, for example, face it beforehand. Can be unsecured with the wrench and deconstructed with a hammer. The light tube option on the crafting menu makes only the tube itself. |
Maintained by the
Civ13 team — (Source Code)
Hosted on GitHub Pages — Powered by
Git-Wiki v2.8.1